Please note: this feature is only available to PRO and Enterprise users.
Active scanning allows you to test your network’s Internet connection speeds. It will test the upload rate, download rate and wireless transmit rate by sending queries to either NetSpot dedicated server or various iperf3 servers and monitoring the speed at which packets are sent and received. You have a choice of running your active scan via HTTP, TCP, or UDP.
Some notes on active scanning:
- We recommend that you only use active scan for one network at a time, because of the additional time required. The scanning time at each data point will increase.
- Active scanning over HTTP requires the ability for your computer to connect to the Internet through that network. So you can only scan networks that your computer has access to — either open ones or the ones your computer has the password stored for.
- During the active scan, NetSpot will disconnect from any other network it is connected to, in order to connect to the network you have designated for active scanning. So any other applications you have running that are connected to the Internet may see a disruption at that time.
- If you do not see the network you wish to scan in the list, quit NetSpot, connect to that Wi-Fi network on your computer, and then try again.
Active Scan via HTTP
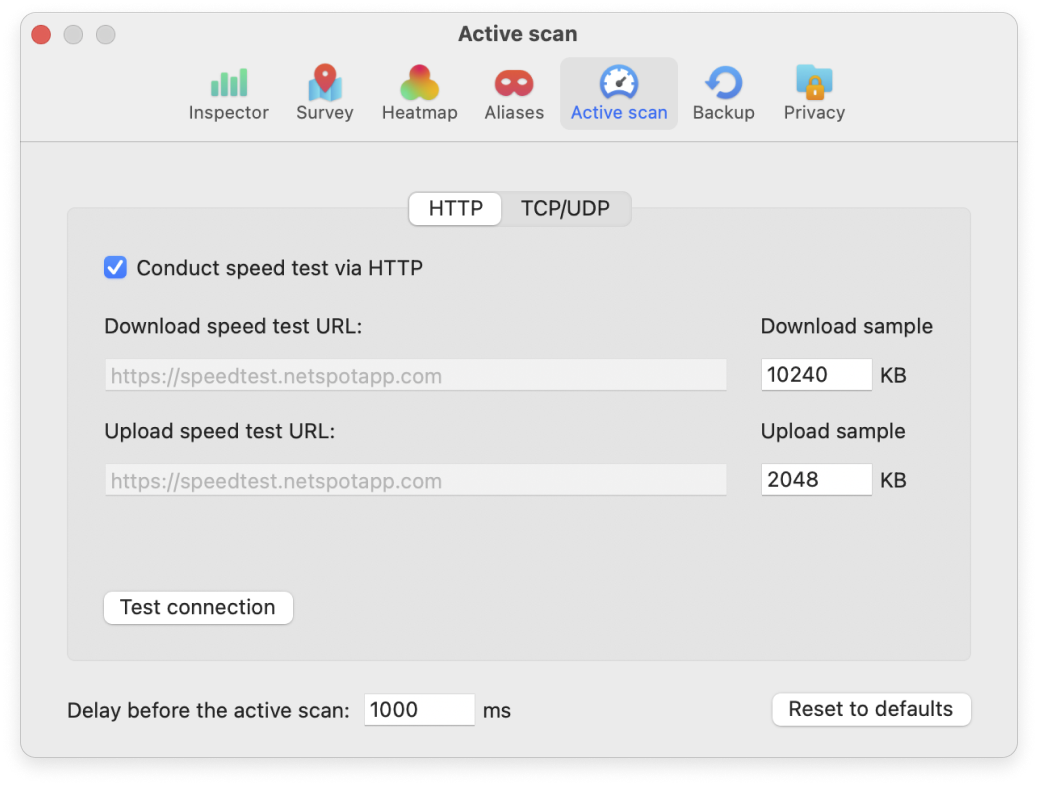
- The default active scan method is via HTTP, using smart cloud technology. If you wish to use this method, no additional setup is needed and you can proceed to the “How to Perform an Active Scan” section below.
- If you would like to adjust the download and upload sample sizes, you can do so in Settings… > Active Scan. Close the Settings window to save your changes and proceed to “How to Perform an Active Scan” below.
- To reset the HTTP settings to default, click the Reset to Defaults button in the Settings panel.
NetSpot WiFi scanner for macOS is available
Active Scan via TCP/UDP with iperf3
- If you would like to use TCP or UDP, the first step is to install Iperf on your server. (Learn more about Iperf.)
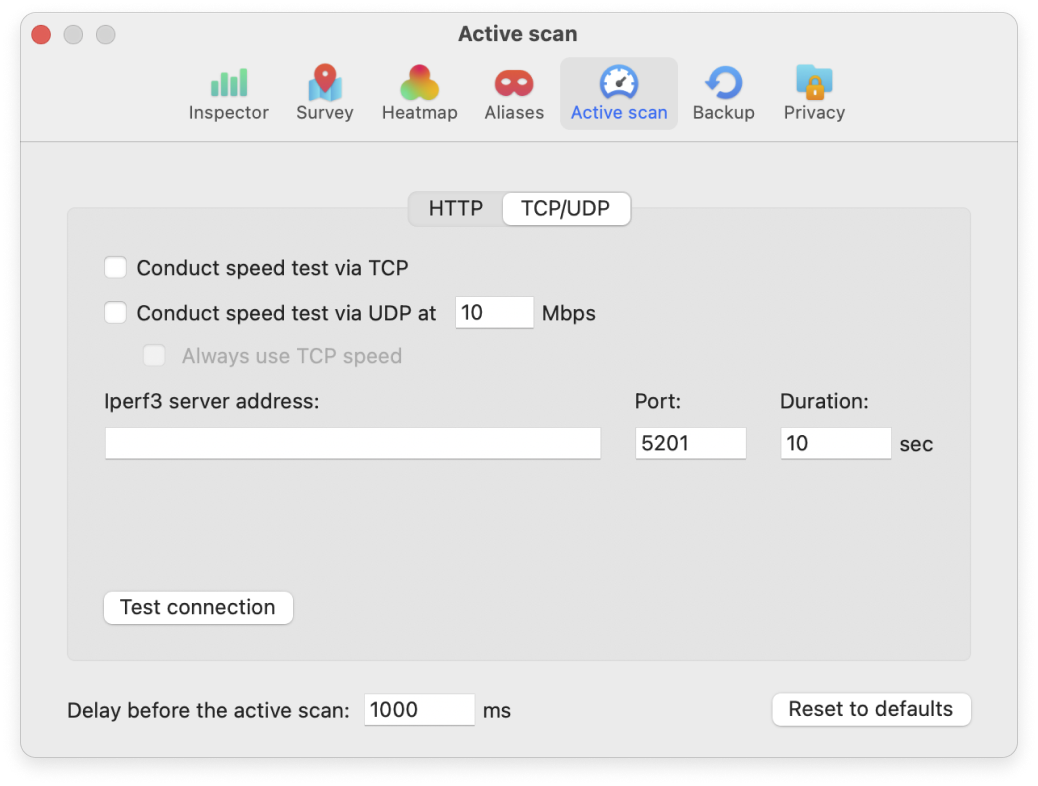
- Select NetSpot > Settings… from the top menu bar and then click the Active Scan tab, then switch to TCP/UDP. Depending on your needs, check either or both boxes next to “Conduct speed test via TCP” and “Conduct speed test via UDP”.
- If you are using UDP, enter your preferred data transfer rate in the Mbps box. The default is 10 megabit per second on macOS, while for Windows OS it is 100 Mbps.
- If you have selected both TCP and UDP, you can choose to check the box next to “always use TCP speed” if you wish to perform the UDP test at the exact same speed as the TCP test. This will override the number you specify in the Mbps box above.
- Enter your iperf3 server address.
- Enter your port (default is 5201) and test duration (default is 10 seconds).
- Click the Test Connection button to ensure that your server connection is working properly.
- Close the Settings window to save your changes and proceed to “How to Perform an Active Scan” below.
- To reset the Iperf settings to default, click the Reset to Defaults.
How to Perform an Active Scan
- Start a new project or add a new zone.
- Load or draw your map. Click Continue.
- By default Active Scanning is disabled. You can enable it for all connected networks, or select specific networks to scan.
- Perform your scan as usual. During the scan, you may get a message that says NetSpot wants to access confidential information stored in your keychain. This is because NetSpot needs the Wi-Fi password in order to connect to some networks. Click “Allow” or “Always Allow” to continue the scan.
-
As you take each measurement, you will notice the animated or color changes to the data point marker while the active part of the scan is taking place.
- Once your survey is complete, you will be able to analyze your results through the following heatmaps:
- Upload Speed (HTTP)
- Download Speed (HTTP)
- Wireless Transmit Rate
- Troubleshooting: Low Download Rate
- Troubleshooting: Low Upload Rate
- Iperf TCP download speed
- Iperf TCP upload speed
- Iperf UDP download speed
- Iperf UDP upload speed
- Iperf UDP jitter
updated: November 21, 2024 author:


