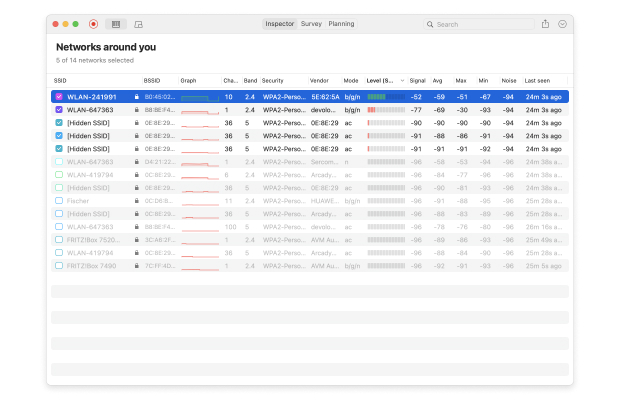
Using a Linux WiFi scanner, you can quickly discover all WiFi networks in your area and learn everything you need to know about their configuration. Let’s take a look at three best scanners that you can install on most Linux distributions, including, of course, Ubuntu and Linux Mint.
As a Linux user, you enjoy virtually limitless control over your operating system. You can also use Linux to control your WiFi network in order to improve its performance and reliability. With a fast and stable wireless connection to the internet, updates will take less time to download, websites will load faster, and audio/video chats won’t suffer from stuttering.
In order to make your WiFi perform better, you need to understand how other WiFi networks that are actively broadcasting in your area are configured. A WiFi scanner application can make this task easy by automatically collecting all important information and making it easy to analyze. The collected information typically includes the WiFi band and channel settings of found networks, their signal strength, security settings, and more.
Once you know how other networks are configured, changing your WiFi settings to avoid interference and other issues that plague poorly configured networks is easy: all you need to do is log in to your router’s admin panel and make your changes.
If you have access to a Windows or macOS computer, you can, of course, use WiFi scanner Mac or WiFi scanner Windows apps, some of which are easier to use than available Linux scanners, and the best ones even have extra useful features, such as the ability to create WiFi heatmaps.
LinSSID is a user-friendly Linux scanner with a graphical user interface and the ability to scan both 2.4 GHz and 5 GHz networks. Because it was written in C++ with Linux in mind, it offers snappy performance even on low-end systems, making it ideal for remote WiFi scanning using an older laptop.
If you’re using a Debian-based Linux distribution, you can install LinSSID with the following commands:
Once LinSSID is installed on your system, you can launch it from the terminal (just type “linssid” and hit Enter) or the application launcher.
The user interface is fairly simple and functional, and all important options are visible at a glance. To start a scan, choose the correct WiFi interface and click the Run button. LinSSID should display a list of all available WiFi networks after just a few seconds, and you can view the configuration of each network, including its SSID, MAC address, channel number, encryption, signal strength, and so on.
If you’re using Linux Mint and have trouble selecting your WiFi interface, we recommend you follow this Linux Mint connect to WiFi guide first.
Linux distributions with GNOME graphical user interface come with a handy tool for controlling NetworkManager, called nmcli. Just like many other useful Linux WiFi tools nmcli, doesn’t have a graphical user interface, but using it to scan available WiFi networks isn’t too complicated once you know the right commands.
Provided nmcli is installed correctly on your system and your WiFi adapter is working correctly (see this Linux Mint WiFi setup guide for more information), you should be able to instantly obtain a list of available WiFi networks with this command:
nmcli dev wifi
If it doesn’t work, run it with superuser privileges (using sudo).
To display even more information about each network, use this command:
nmcli -f ALL dev wifi
This page explains everything this WiFi analyzer for Ubuntu, Linux Mint, and other distributions with GNOME can do.
Wavemon is another tool that you can use on Ubuntu to scan WiFi networks. To install it, enter the following command in the terminal:
sudo apt install wavemon
Of course, you can also build it on other Linux distributions, and the instructions on how to do so are conveniently provided on its GitHub page.
Despite not having a graphical user interface, wavemon is surprisingly user-friendly because you don’t need to know any commands to use it. That’s because it’s actually a text user interface (TUI) application that list all main options right on the main screen. If you would like to learn more about each available option, we recommend you read wavemon’s man page.
Even though Linux users can choose from several reliable WiFi scanners, there’s really no alternative to tools like NetSpot, especially when it comes to usability.
NetSpot runs on macOS and Windows, and it can be used by experienced network administrators and regular home users alike for wireless site surveys, Wi-Fi analysis, and Wi-Fi troubleshooting.
If none of the Linux WiFi scanners described in this article managed to win you over, we recommend you give it a try and download the free version from its website.
To quickly discover available WiFi networks on Linux, you can use the WiFi utility provided by your desktop environment, such as GNOME Network Manager. If you want to see more detailed information about individual networks, we recommend you download a Linux WiFi scanner.
Nmcli is a command-line tool for controlling NetworkManager and reporting network status, and you can use it to scan WiFi networks using the following command: nmcli dev wifi.
To use LinSSID, you first need to install it from your distribution’s repositories. Then, launch the app and enter your admin password. To start scanning, select your WiFi interface (wlan0 usually) and click the Run button.